This error affects paper patterns purchased before 10/3/2016.
Corrected bodice and sleeve pieces for Rue are available digitally.
We fixed some drafting issues on the Rue pattern and altered the design according to your feedback. Along with corrections to the armscye and sleeve that improved fitting issues, we adjusted the bust of the pattern so that the style lines fit fully underneath the bust.
If you purchased a paper pattern in our shop, we will also send you corrected tissue pattern pieces to the address we have on file, which should be at the end of November. We will automatically send these new pattern pieces, there’s no need for you to send us your information again.
If you purchased the printed version at a shop and not directly through us, please contact us and we’ll ship the new bodice pattern pieces to you. Please be sure to include your name and mailing address.
Download the corrected sleeve and bodice pieces at the bottom of this article.
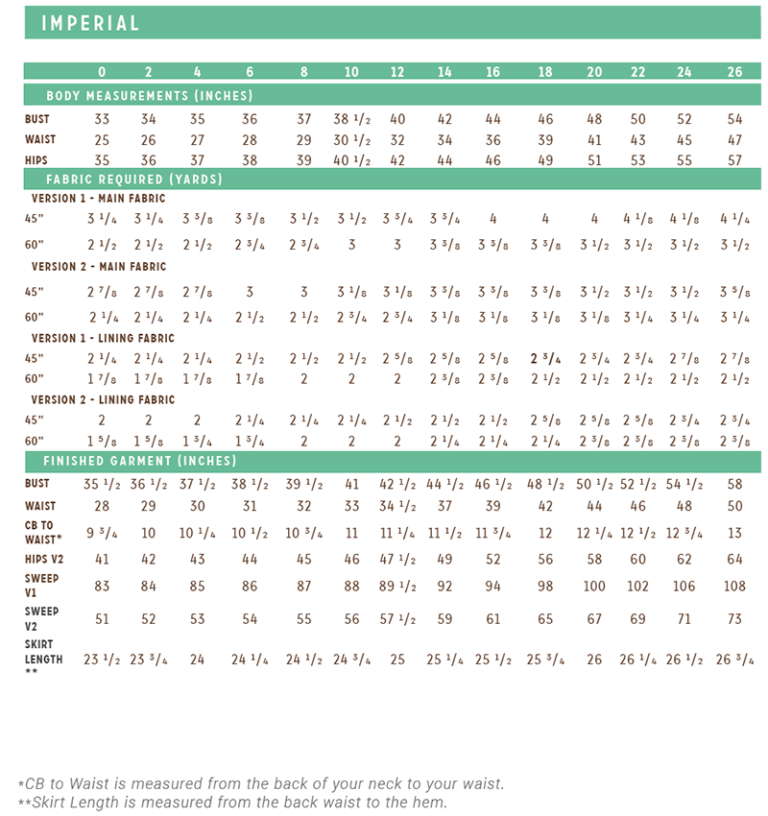
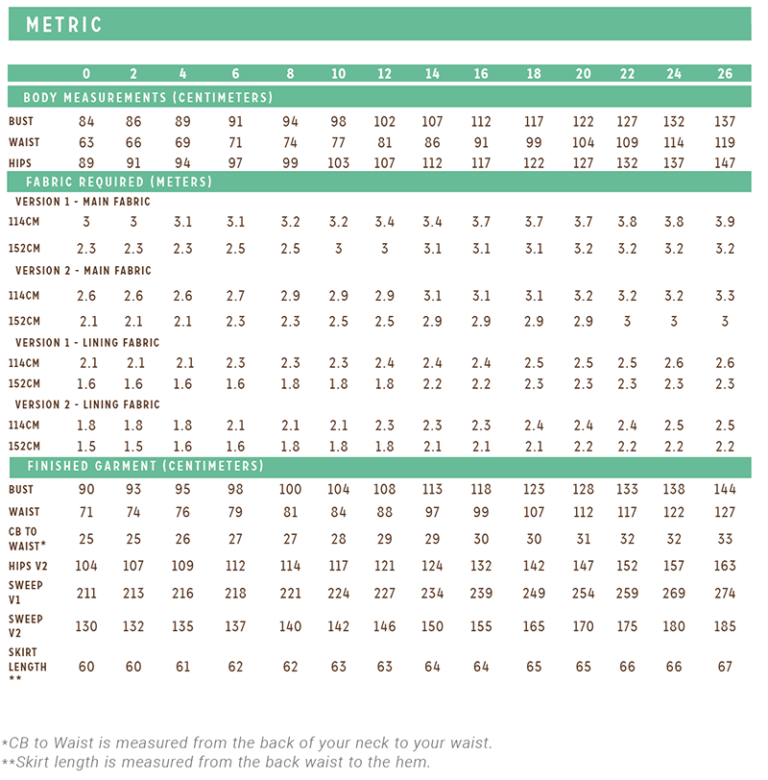
Here is the corrected size chart, with updated finished garment measurements:
You can read more by clicking the link below to get instructions for adjusting the style lines on the original, uncorrected bodice.
Style Line Adjustments
If you would like to change the placement of the bust style line to hit under the bust, follow these instructions for altering your pattern.
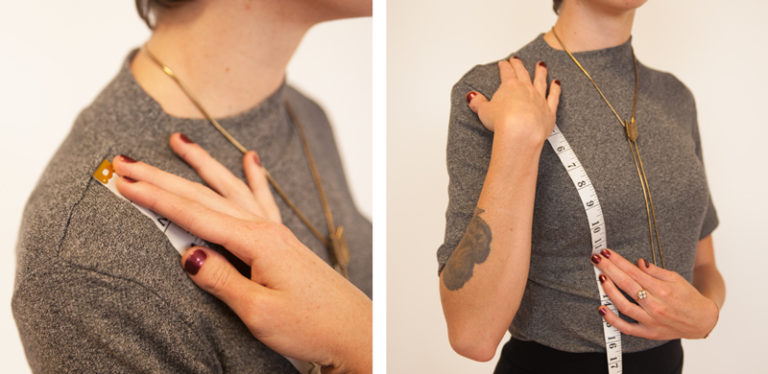
To determine the amount needed to be added to the center front bodice, measure the distance from your mid-shoulder to your underbust. Add 1″ bust ease to this measurement, this is now your finished shoulder to underbust measurement.
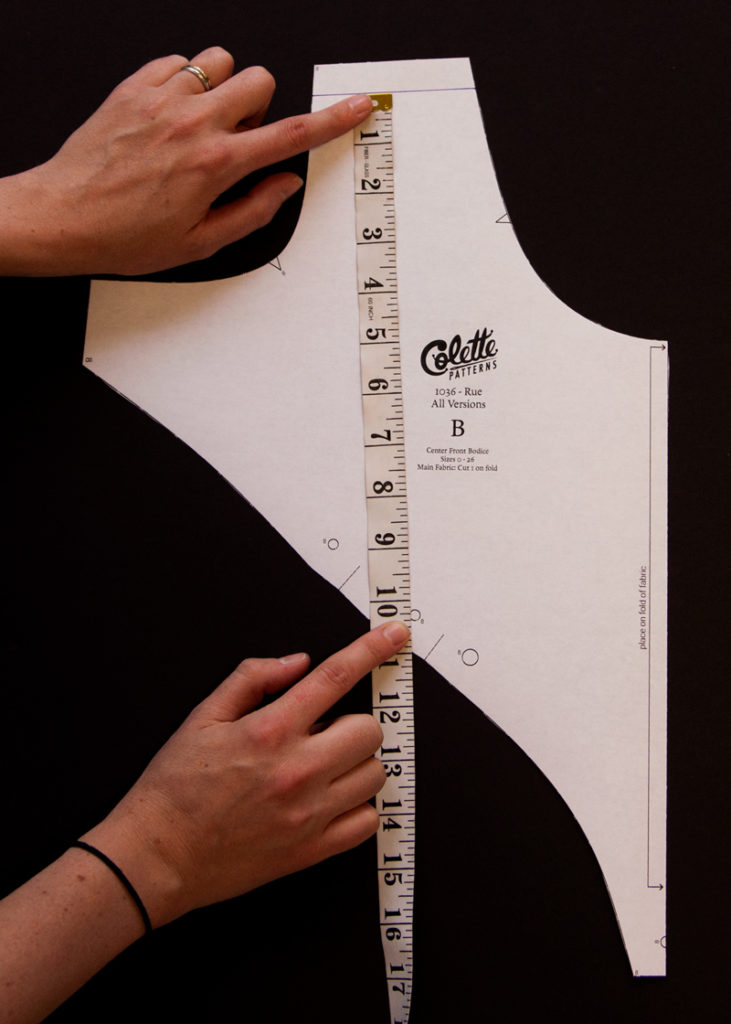
Measure the center front bodice piece from the mid-shoulder seam line to the dot that is the second from the right.
Subtract this pattern measurement from the your finished shoulder to underbust measurement. This is the amount needed to be added to the length of the center front bodice.
In these photos, the mid-shoulder to underbust measurement is 11.5″. After adding 1″, the finished shoulder to underbust measurement is 12.5″.
The pattern measurement is 10 1/4″. Therefore, the pattern needs to be lengthened 2 1/4″.
Center Front Bodice
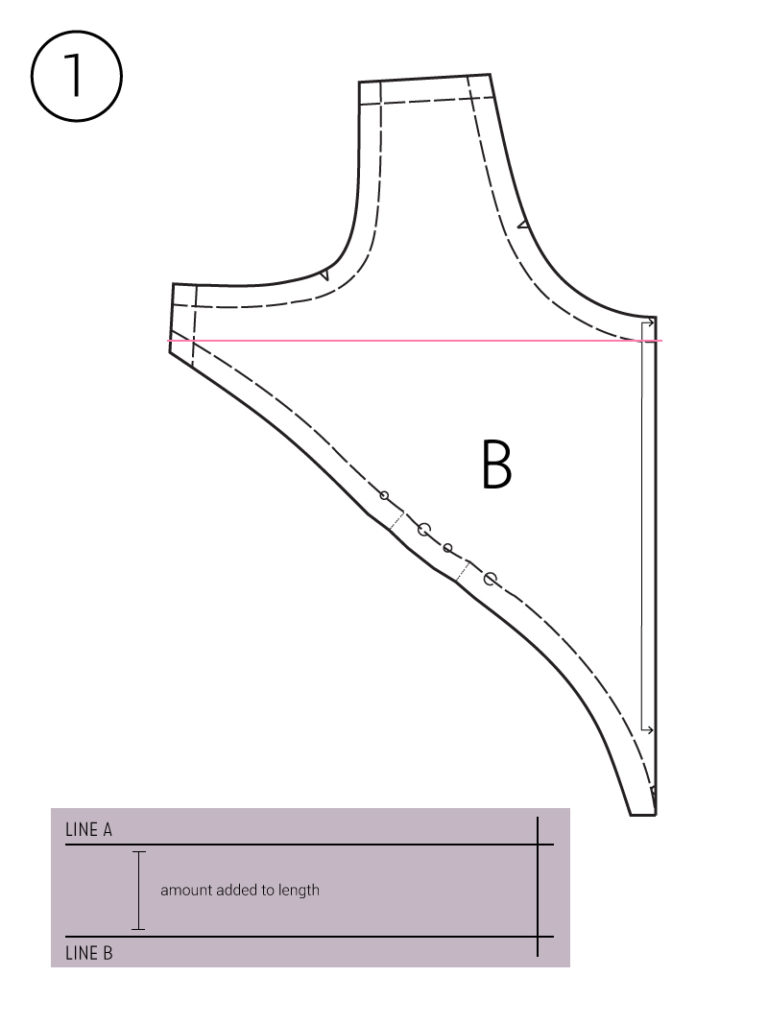
First, draw in all seam lines throughout the pattern piece. Draw a line perpendicular to the grainline from center front to the side seam. On a separate piece of paper, draw 2 parallel lines, the distance between these lines should be the amount needed to be added to the length. Draw a line perpendicular to these two lines on one end.
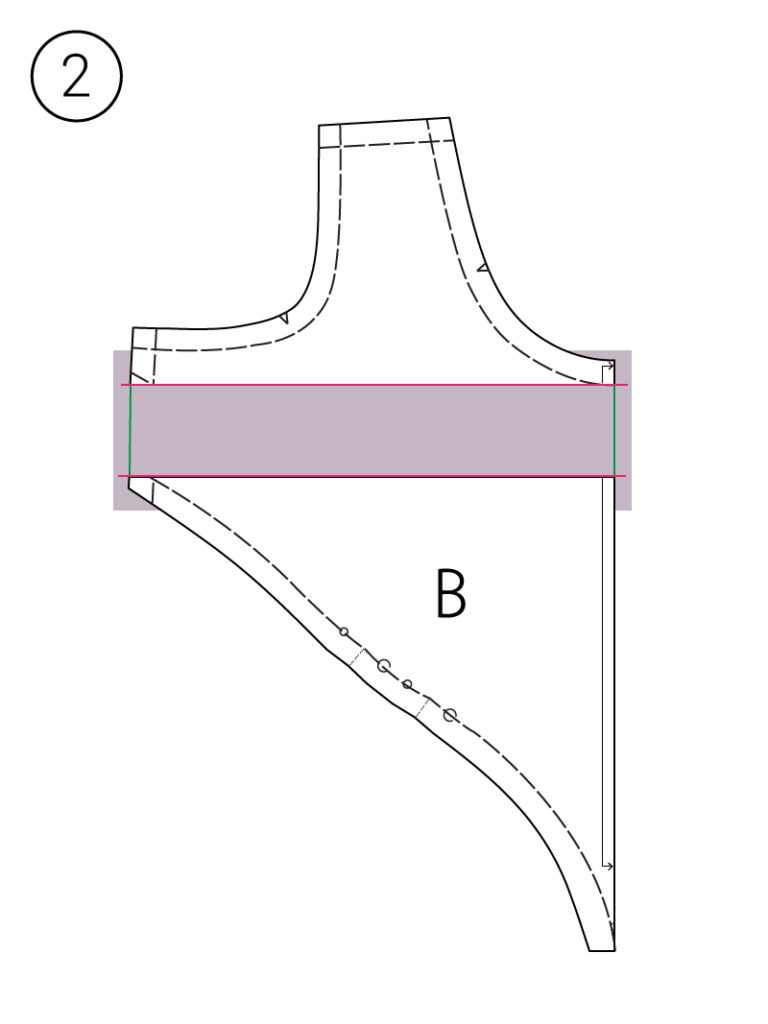
Cut through the line drawn on your center front bodice.
Bring the scrap paper behind the center front bodice pieces. Align the cut edge of the bottom portion of the slashed pattern piece with the bottom line on your scrap piece of paper. Match the center front line and tape in place.
Align the cut edge of the top portion of the slashed pattern piece with the top line on your scrap piece of paper. Match the center front line and tape in place. Blend seam allowances and seam lines through the scrap paper. You have now lengthened the upper bust area.
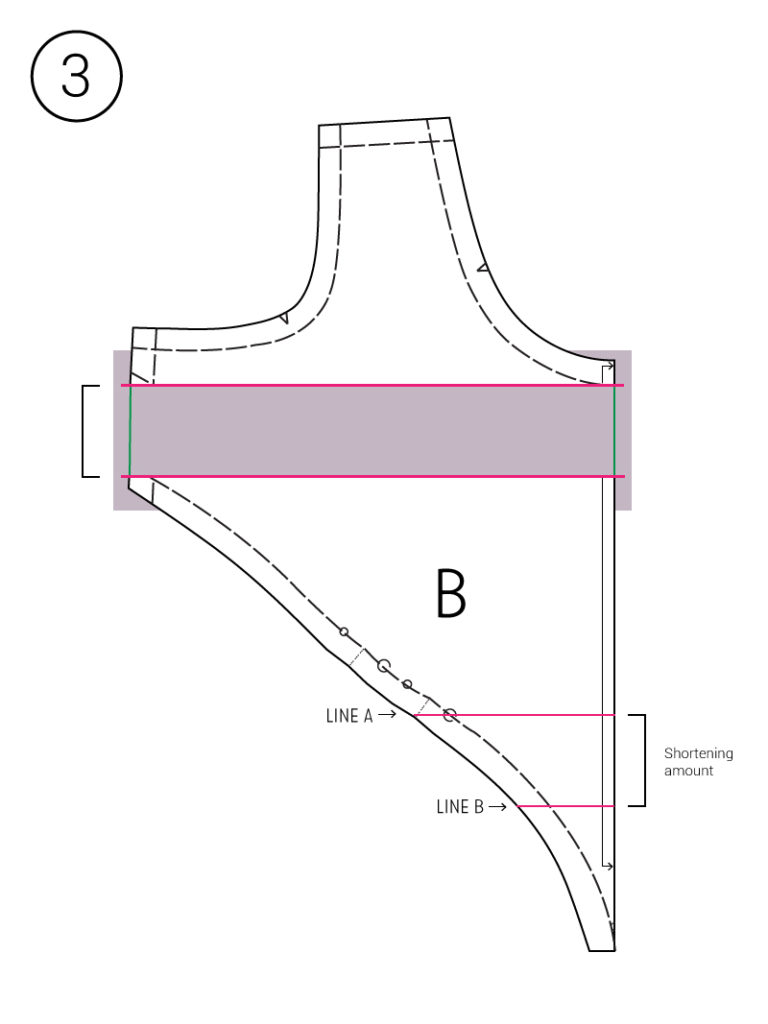
Now, it’s time to shorten the length underneath the bust points to counteract the length that was just added. Start by drawing a line perpendicular to the fold line from center front to the first, inside tuck. This is line A. Draw an additional line, parallel to line A. The distance between these lines should be the amount that was previously added to the length.
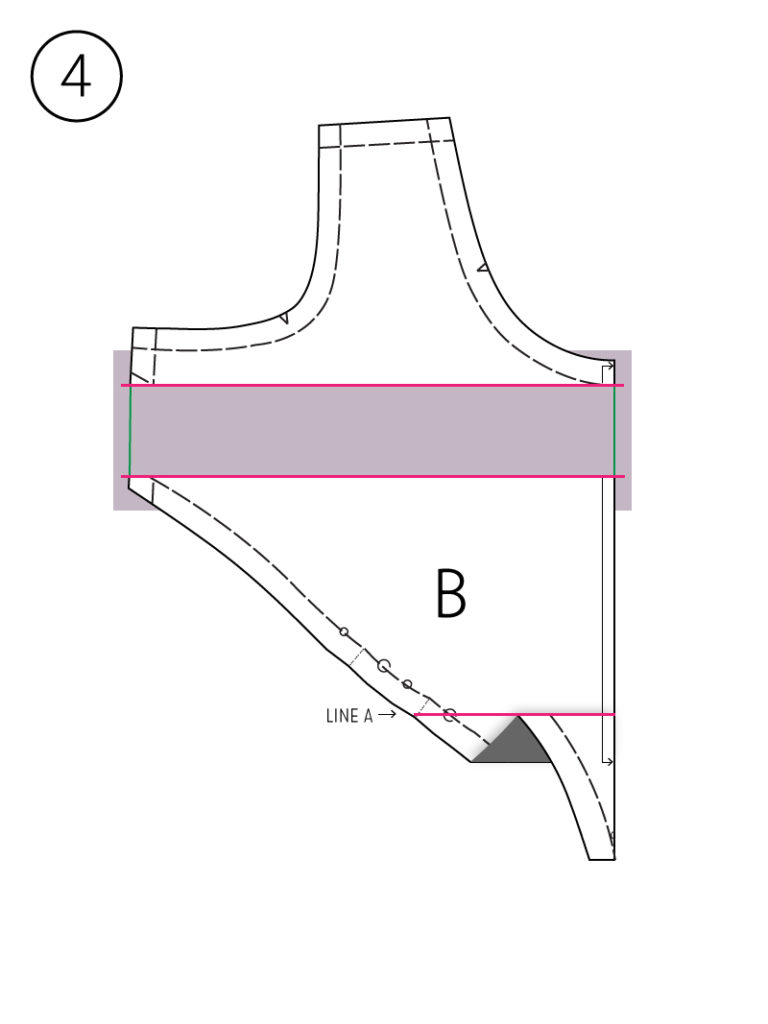
Fold line B to line A, making sure to keep the center front line straight.
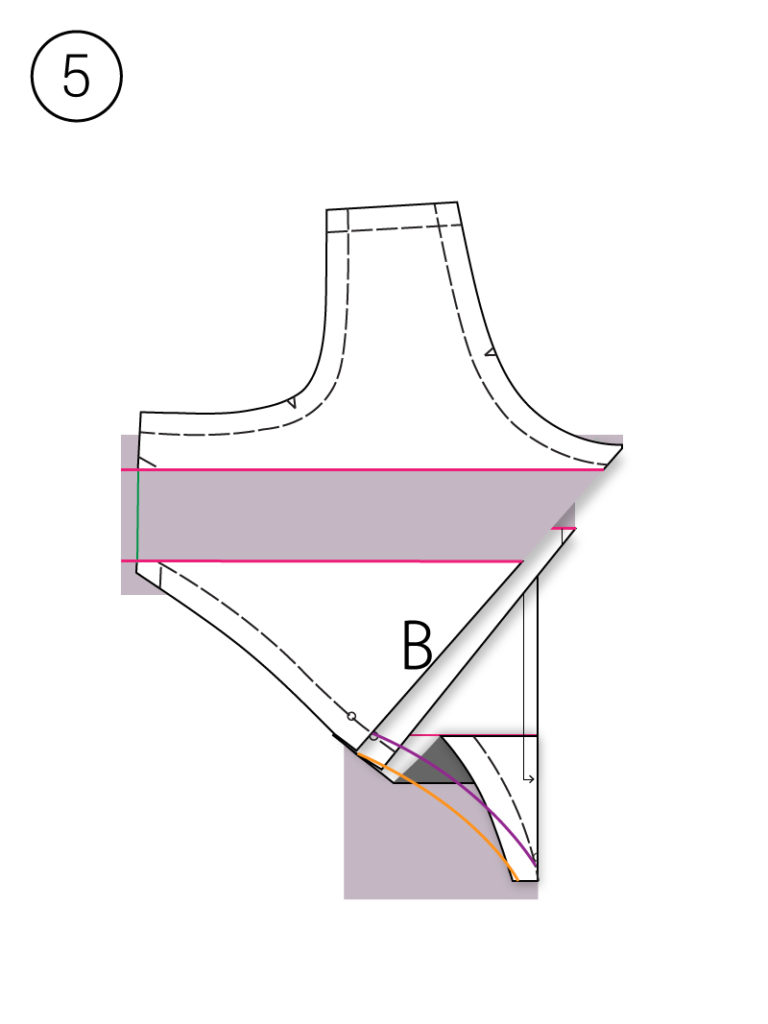
Fold the tucks of your pattern paper, temporarily tape in place. Bring a scrap piece of paper behind the lower portion of the center front bodice. Redraw the seam line from the first visible dot to the dot at center front. On the illustration above, this is the purple line. Draw in a 5/8″ seam allowance from this seamline, on the illustration this is the orange line. Before unfolding the tucks, trim off the excess paper by cutting this line.
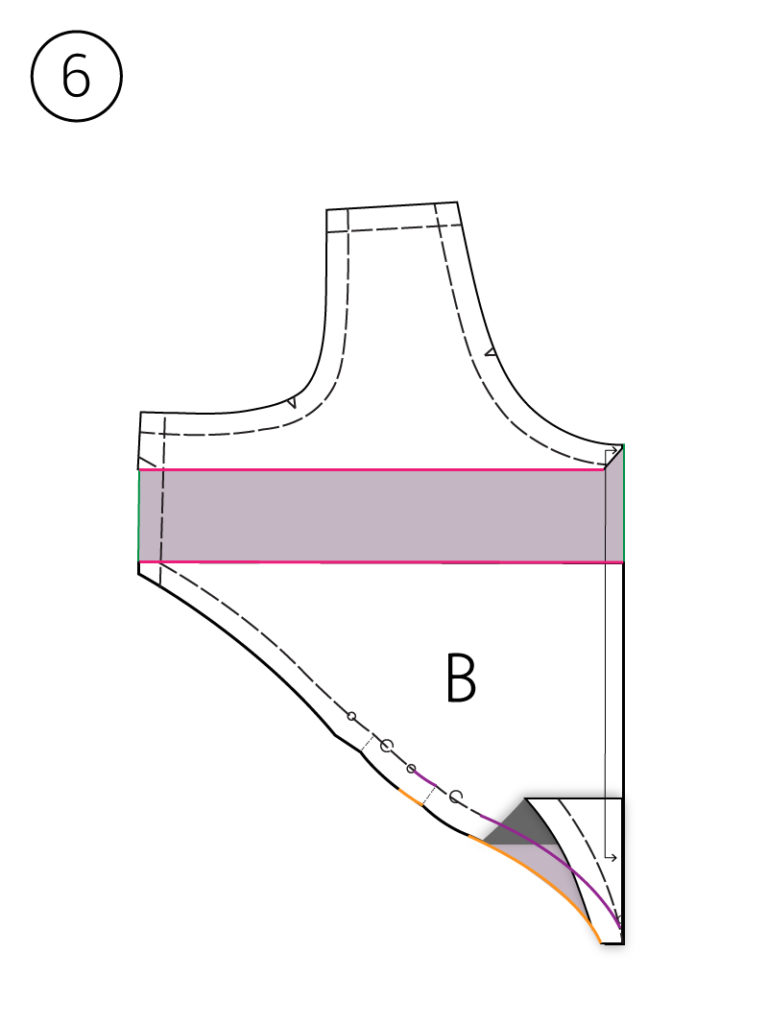
After trimming excess paper, your pattern should look similar to this.
Side Front Bodice
Since you have shortened the length under the bust on the center front bodice, you’ll need to also shorten the side front bodice, which sits directly under the bust.
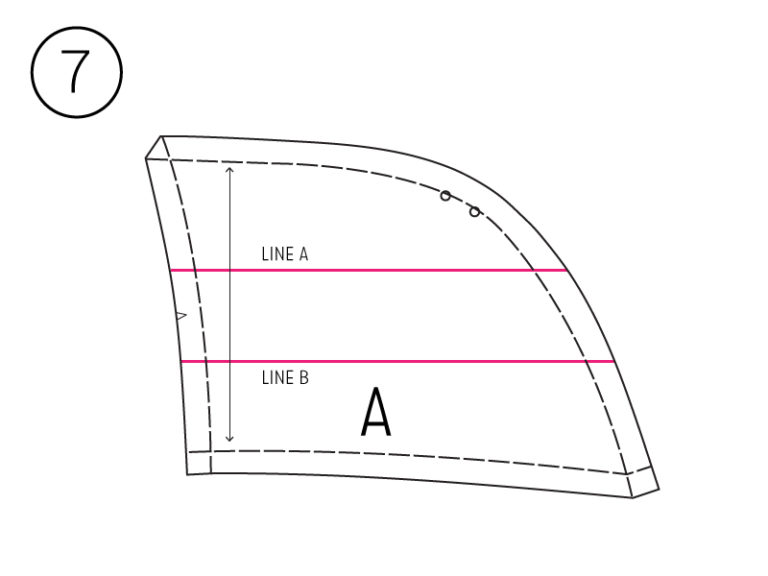
Start by drawing a line perpendicular to the grainline from side seam to the curved style line, under the tuck dots. This is line A. Draw an additional line, parallel to line A, the distance between these lines should be the amount that was previously shortened from the center front bodice. This is line B.
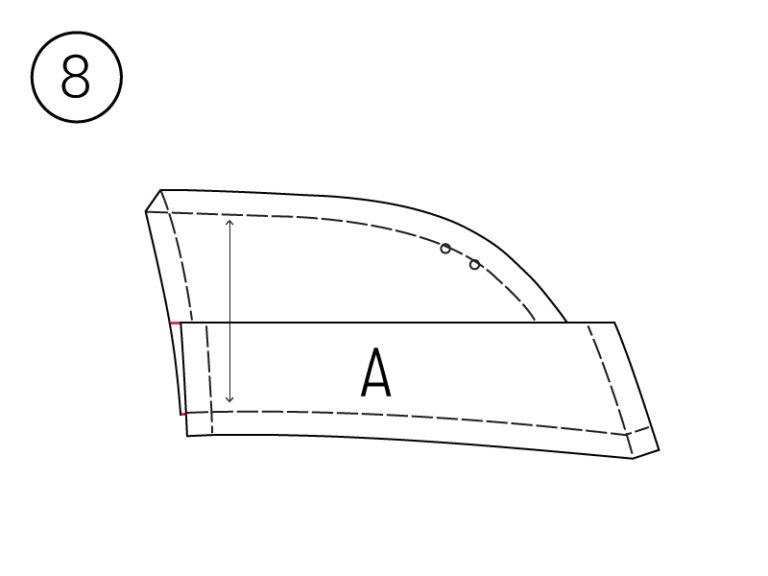
Fold line B to line A, making sure to keep the grainline aligned.
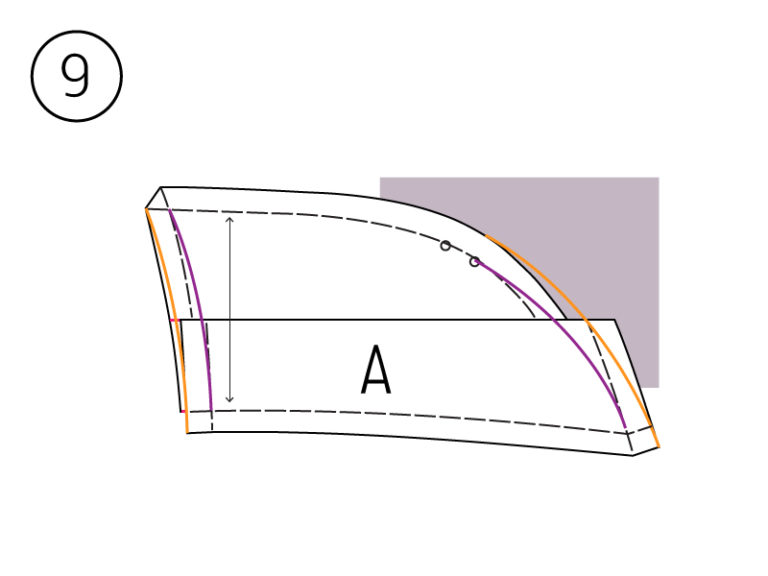
Bring a scrap piece of paper behind the style line. Redraw the style line seamline from the right tuck dot to the waist seam line, add seam allowance, and trim.
Redraw the side seamline from the style line seam line to the waist seam line, add seam allowance, and trim.
In the illustration above, seamlines are purple and seam allowance lines are orange.
Again, please contact us if you have any comments or concerns.
Posted October 3, 2016